How to Apply a .cube LUT to a Screen Recording
Apply a .cube LUT to a screen recording or webcam clip without exporting to a video editor: upload the LUT in Tella's Filters panel, set its intensity, and choose which clips it covers.
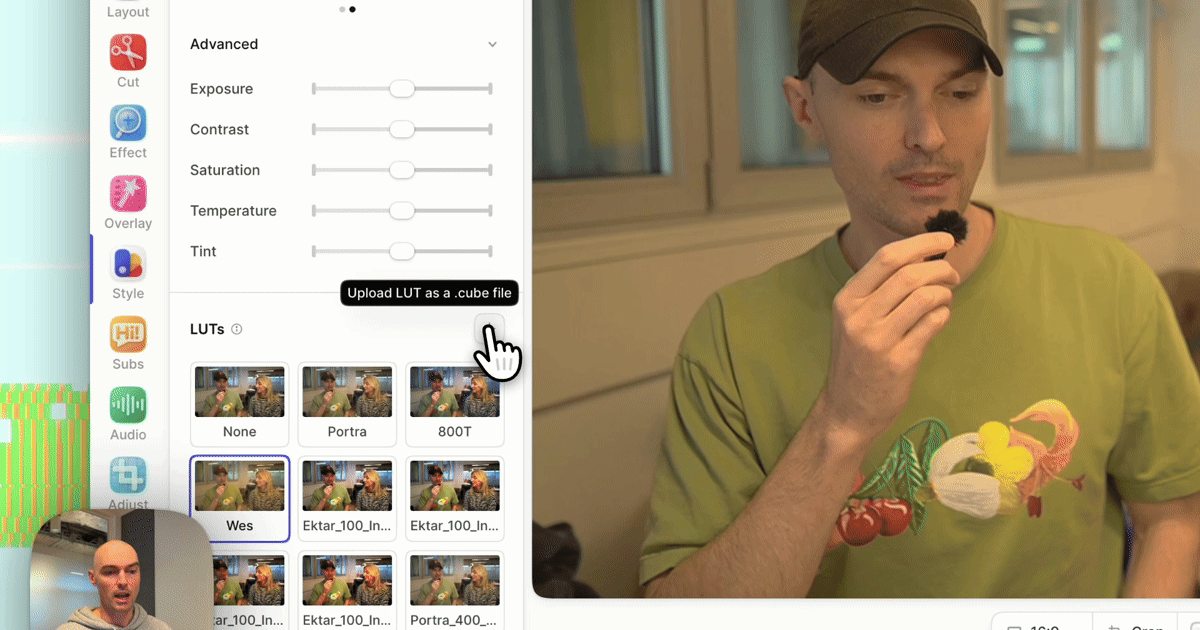
To apply a .cube LUT to a screen recording in Tella, open the video in the editor and press B to open Style. Click Customize under Filters, then choose a LUT in the LUTs section, or click Upload LUT as a .cube file to add your own. Use LUT intensity to set how strong it is. It applies to every matching clip in the video, and the share link and MP4 export both include it. You don't export to Premiere or CapCut and upload again.
The rest of this post covers what a LUT does, which files work, how to use one on camera and screen separately, and how to keep one clip different.
What is a LUT?
A LUT (lookup table) maps each input color to an output color. A 3D LUT stores the mapping as a cube of sample points, and colors between those points are interpolated. Colorists use them to apply a consistent look, like a film stock emulation or a brand grade, across many clips in one step.
In a screen recording, a LUT is mostly for the camera. Faces and rooms are where a film look shows. Product UI usually looks best close to its original colors, which is why Tella lets you grade the camera and screen separately.
Which LUT files does Tella support?
Tella supports 3D .cube LUTs up to size 65, and rejects 1D LUTs:
- A 3D
.cubefile.LUT_3D_SIZEcan be anything up to 65, so the common 17, 33, and 65-point cubes all work. Files withDOMAIN_MINandDOMAIN_MAXlines are supported. - Not a 1D LUT. Files declaring
LUT_1D_SIZEare rejected. Convert.3dlor other formats to a 3D.cubefirst. - A video in Tella. This can be a new recording from the Mac app, Windows app, Chrome extension, or web recorder, or a video you uploaded.
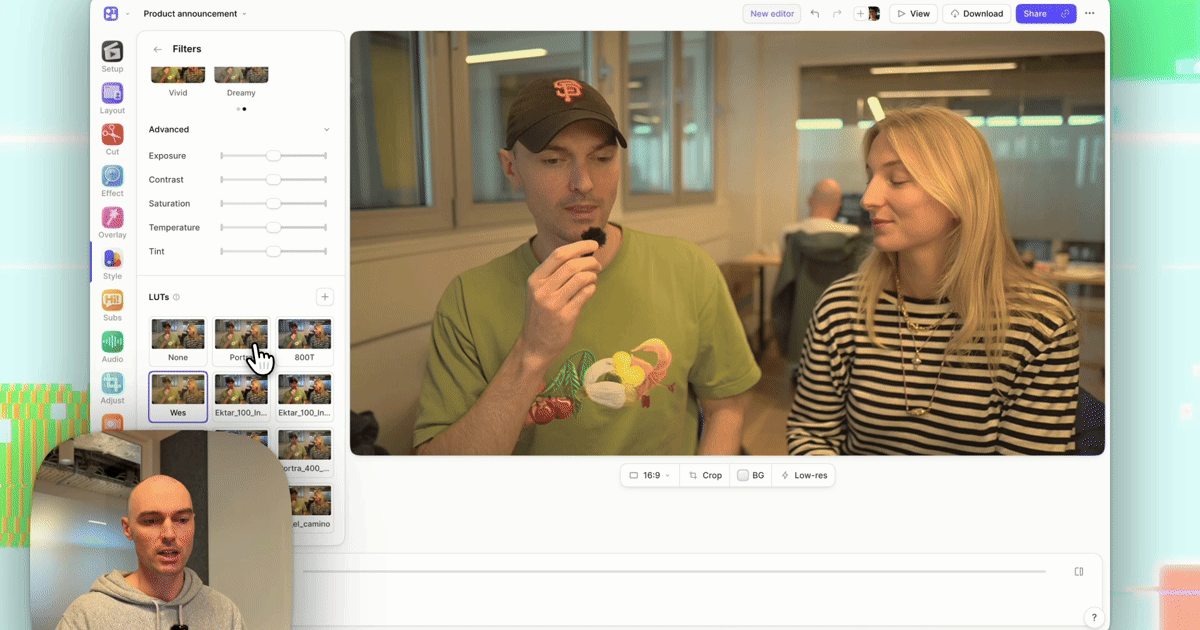
If you don't have a LUT, Tella includes three: Portra (a warm film stock look), 800T (a tungsten night film look), and Wes (a pastel, symmetrical-cinema palette).
Step 1: Open Filters
- Open the video in the editor and select a clip.
- Click Style in the toolbar, or press
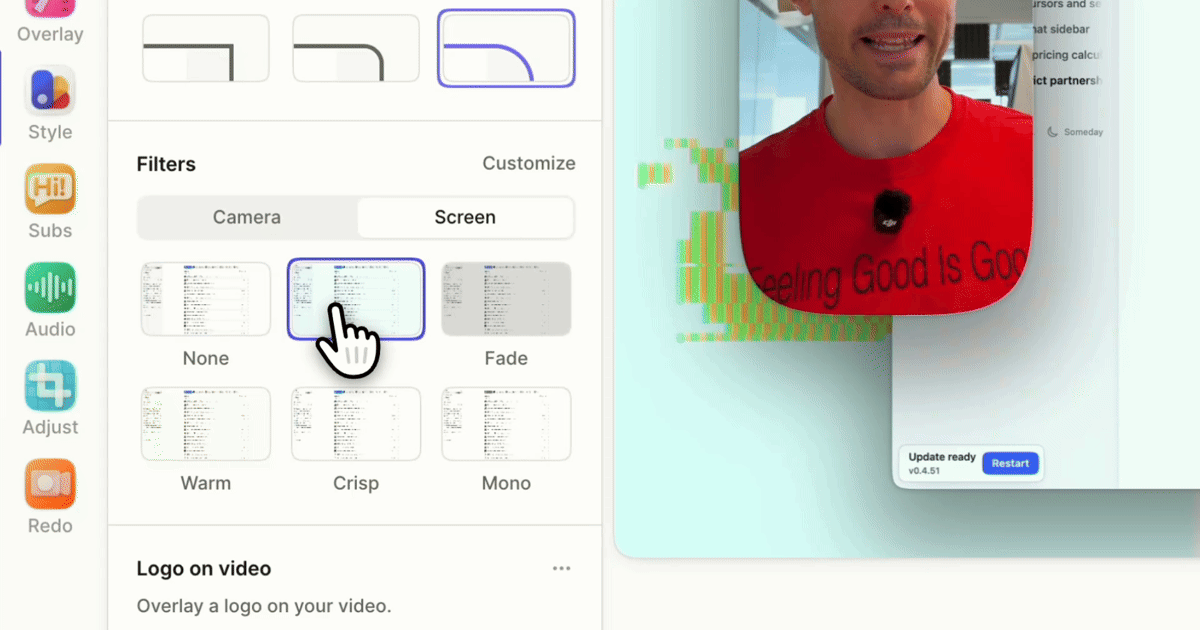
B. - Under Filters, pick Camera, Screen, or Media if the clip has more than one source.
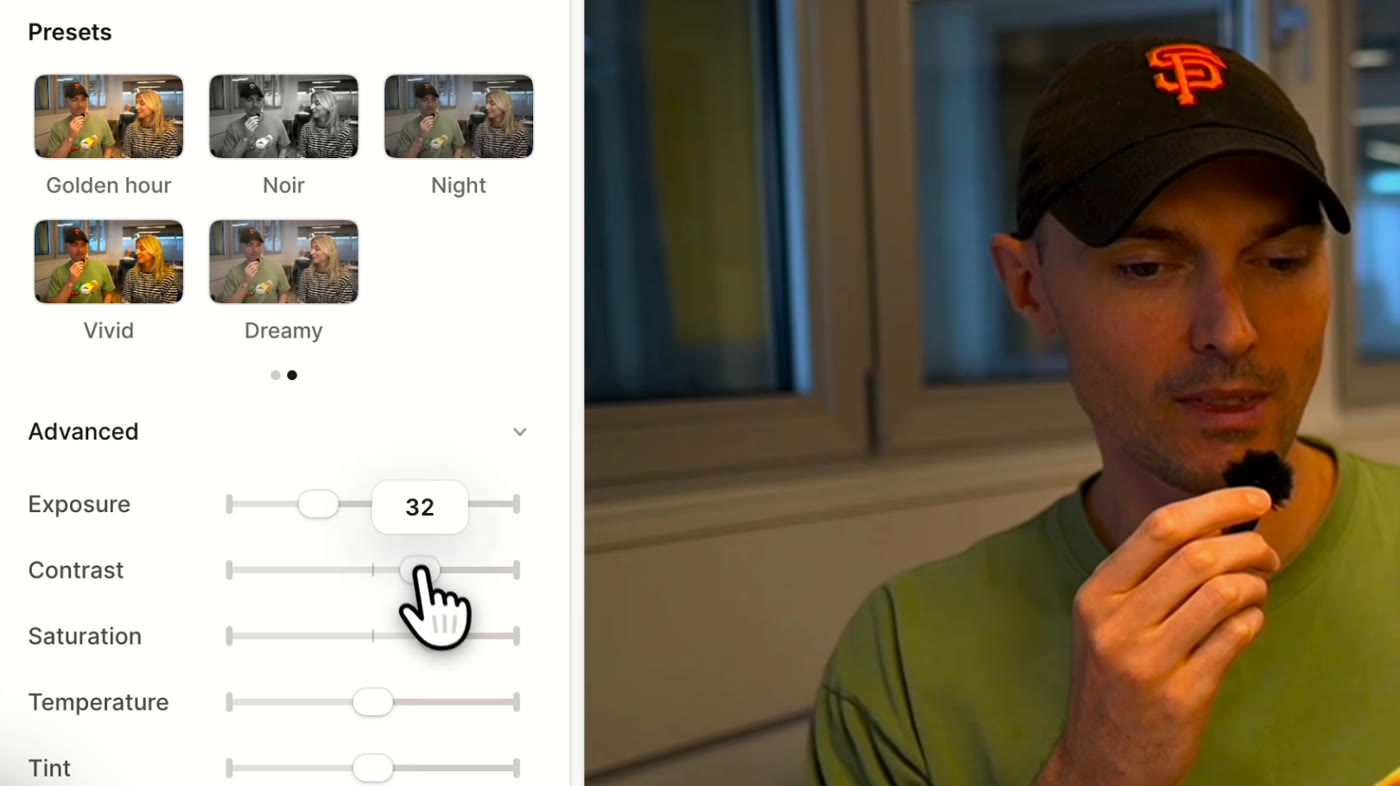
- Click Customize to open the full Filters panel.
The panel has three sections: Presets, Advanced (the sliders), and LUTs.
Step 2: Choose or upload a LUT
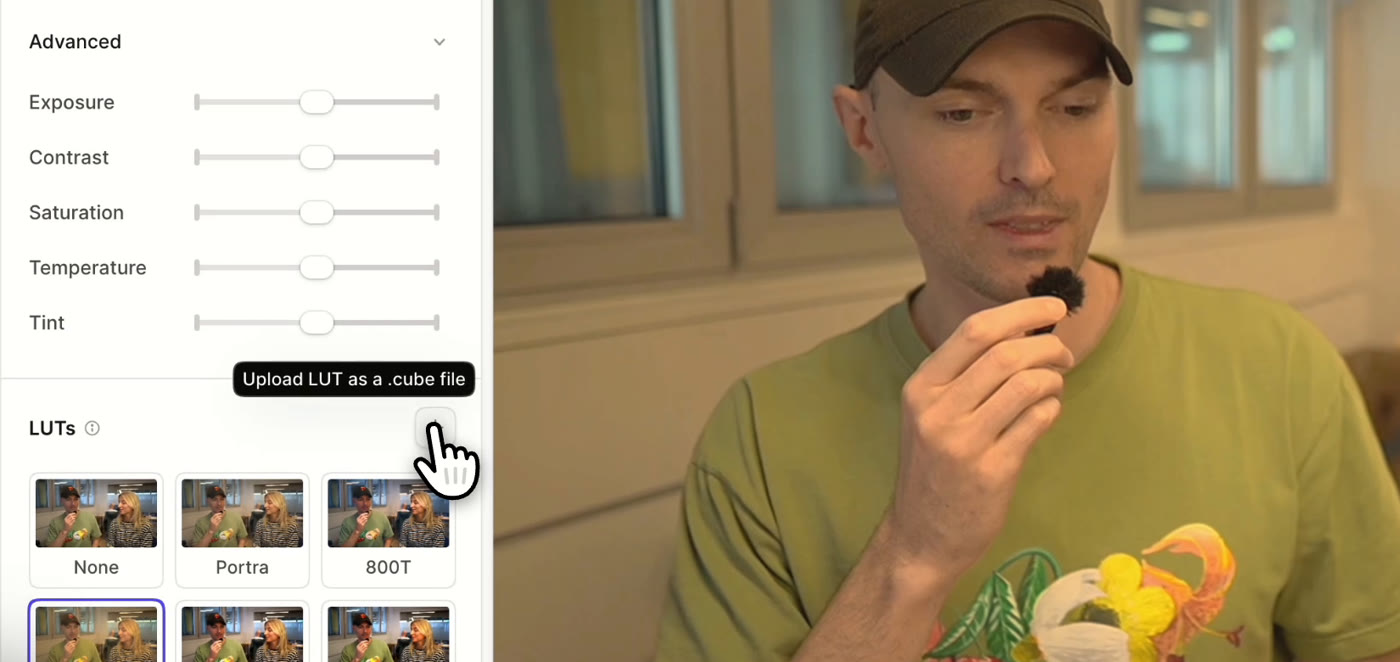
In LUTs:
- Click Portra, 800T, or Wes to try a built-in LUT.
- Click Upload LUT as a .cube file and pick your file. Tella checks it, saves it to your media library, and applies it at full strength.
- Click None in the grid to remove the LUT.
An uploaded LUT stays in your library, so next time it's in the grid next to the built-in ones. LUTs a teammate shares to the workspace show up there too.
Step 3: Set LUT intensity
Most LUTs are made for log or flat footage, so at full strength on a normal webcam feed they can look heavy. Crushed shadows, orange skin and blown-out highlights mean the LUT is too strong.
Drag LUT intensity down until the look reads as a grade rather than an effect. Somewhere between 40% and 70% is common for webcam footage. Scrub to a few different moments before settling, because a value that looks right in a bright frame can be too much in a darker one.
Step 4: LUT or sliders, not both
In the editor, a LUT and the Advanced sliders don't stack: choosing a LUT (or a preset) resets the sliders, and moving a slider removes the LUT. So with a LUT applied, LUT intensity is the control you tune. If the LUT still looks wrong at a lower intensity, try another LUT, or drop the LUT and correct the footage with the sliders instead:
| Problem | Adjust |
|---|---|
| Face too dark or too bright | Exposure |
| Skin too orange or too blue | Temperature |
| Green or magenta cast from office lighting | Tint |
| Flat, low-contrast webcam | Contrast |
| Colors too strong or too weak | Saturation |
Change one slider at a time and compare against the original. If you need a LUT combined with slider corrections, the API and MCP server can set both on a clip.
Step 5: Decide which clips it covers
A filter applies to the same kind of recording across clips by default. A LUT on the camera covers every camera clip in the video, and a LUT on the screen covers every screen recording. This is what keeps a multi-clip video consistent.
To grade one clip differently, for example a clip recorded by a window at a different time of day, select it and check Apply to this clip in the Filters panel. Unchecking it doesn't restore the shared filter to that clip: it copies that clip's current filter to every matching clip. To bring an outlier back in line, leave the box checked and pick the same LUT and intensity as the other clips.
Filters on media you've added to a clip, like b-roll, affect only that media.
Should a LUT go on the camera or the screen?
Put the LUT on the camera and leave the screen alone or lightly graded. For product demos and tutorials:
- Camera: apply the LUT here. This is where it pays off.
- Screen: leave it at None, or use a light touch. A LUT shifts UI colors, and viewers notice when a product's brand blue turns teal. If the screen looks flat next to a graded camera, the Crisp preset adds contrast and saturation without changing hues much.
- Uploaded footage: grade it like camera footage so it matches your face cam.
Do exports and share links include the LUT?
Yes. The share link and exports use the same filter as the editor, so what you see in the editor is what viewers get, and changing the LUT after sharing updates the link. Before sharing, play through the video once with Filters open. Watch for:
- Clips recorded in different lighting, which need Apply to this clip and their own correction.
- Skin tones in the brightest and darkest moments.
- Screen text, which should stay crisp and readable.
Related reading
- Adjust your video's colors with filters: the help center reference for presets, sliders, and LUTs.
- Color filters for product demos: which preset to use for which kind of recording.
- How to color grade your webcam without CapCut or Premiere.
Try Tella free for 7 days and put your LUT on the next demo.