How to Color Grade Your Webcam Without CapCut or Premiere
Give a webcam recording a film look without exporting to a timeline editor: correct exposure and white balance, add a LUT, and keep the screen recording untouched, all in the same place you share the video.
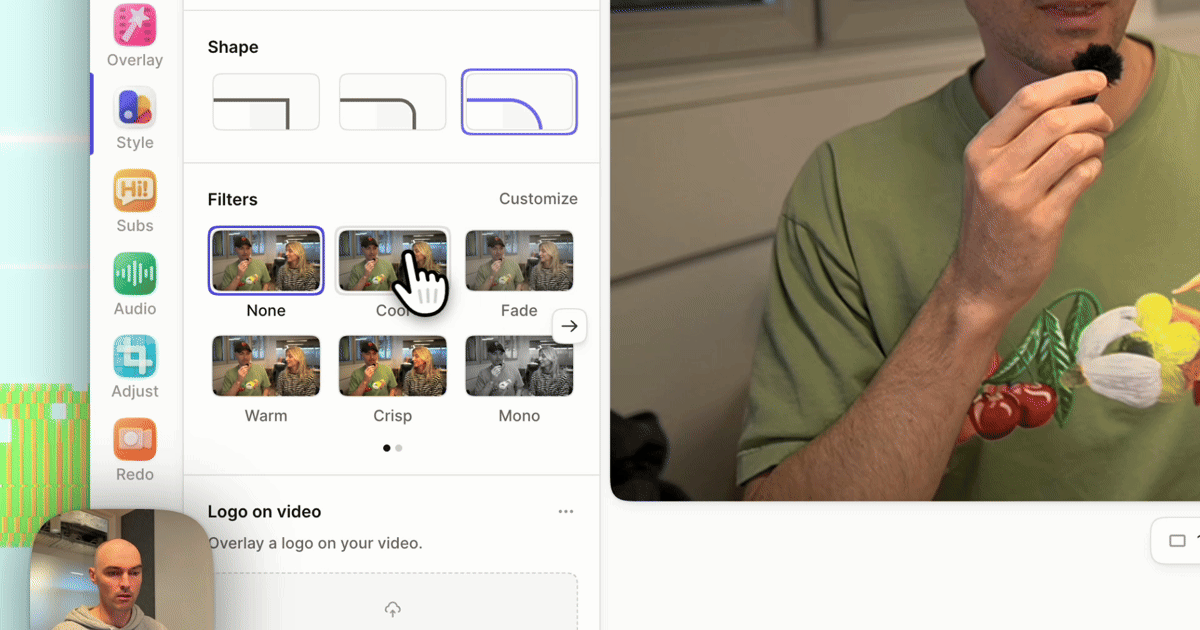
You can color grade a webcam recording without CapCut, Premiere, or DaVinci Resolve if you grade it where you edit and share it. In Tella, open the video in the editor, press B for Style, and choose the Camera tab under Filters. Pick a preset, or click Customize to either correct Exposure, Temperature, and Tint or add a .cube LUT. The grade applies to the camera only. The screen recording keeps its colors, and the share link updates without a re-export.
Below: why this is simpler than a timeline editor for async video, how to grade a webcam, and when you still want Premiere or Resolve.
Why a timeline editor is a detour for async video
A timeline editor grades a file. For a screen-plus-camera video, the workflow looks like this:
- Record in your screen recorder.
- Export or download the recording.
- Import it into CapCut, Premiere, or Resolve.
- Grade it.
- Export again, which can take a long time for a long demo.
- Upload the new file wherever you share videos, and replace the old link.
Two more problems come up for screen recordings:
- One composited file. Many recorders save the camera bubble burned into the screen recording. Grading only the face in a timeline editor then means drawing and tracking a mask around the bubble, or accepting that the grade also changes your product UI.
- Fixes restart the loop. Spot a typo in the title card after uploading, and you're back to step 3.
Tella records the camera and the screen as separate tracks and hosts the video. The grade lives on the camera track, and the link viewers already have picks up any change.
Tella vs CapCut vs Premiere vs Resolve for webcam color
| Tella | CapCut (desktop) | Premiere Pro | DaVinci Resolve | |
|---|---|---|---|---|
| Where you grade | In the recorder's editor | Timeline editor | Timeline editor | Color page |
| Presets | Warm, Cool, Crisp, Fade, Mono, plus five camera looks | Filters library | Lumetri Creative looks | Built-in LUTs |
Custom .cube LUTs | Yes, with intensity | Yes | Yes | Yes |
| Grade camera separately from screen | Yes, separate tracks | Only if recorded separately | Only if recorded separately | Only if recorded separately |
| Masks, qualifiers, scopes | No | Masks | Yes | Yes |
| Share after grading | Existing link updates | Export and upload | Export and upload | Export and upload |
Timeline editors are more powerful at color. For a talking head over a product demo, you mainly need correct exposure, correct white balance, and one consistent look, and you don't need an export step for that.
Choose: a correction or a look
In the editor, a LUT and the Advanced sliders don't stack: choosing a LUT (or a preset) resets the sliders, and moving a slider removes the LUT. So decide what the camera needs:
- A natural, corrected image: use a preset and the sliders (Option A).
- A film look: use a LUT and tune its intensity (Option B).
If you want a LUT on top of slider corrections, the API and MCP server can set both on a clip.
Option A: Correct with presets and sliders
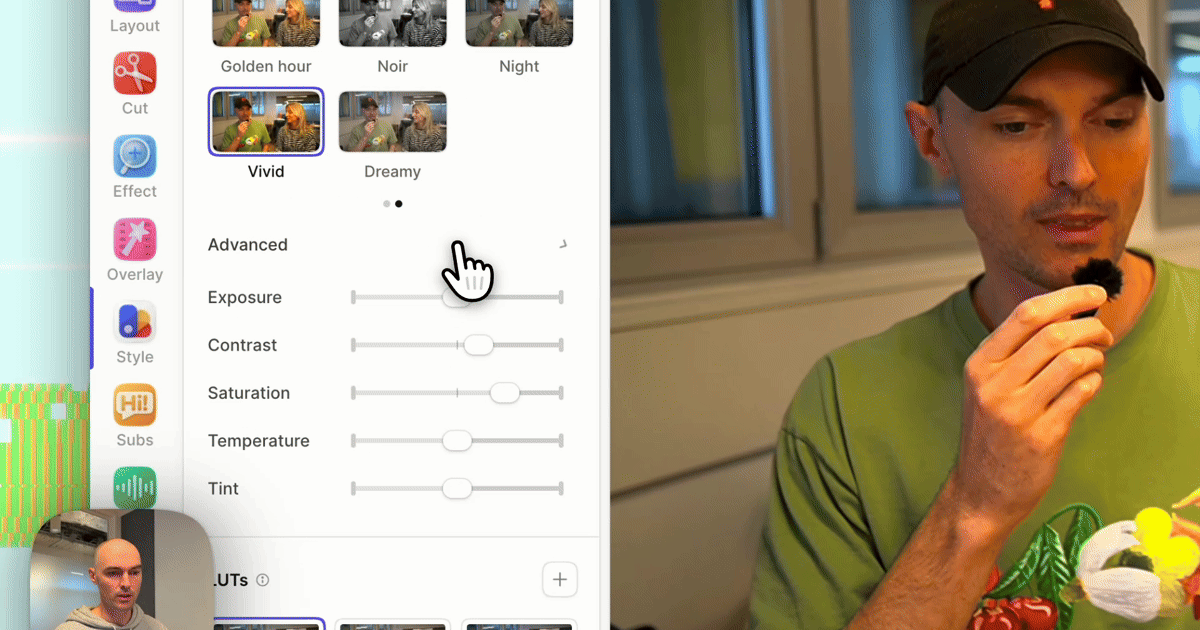
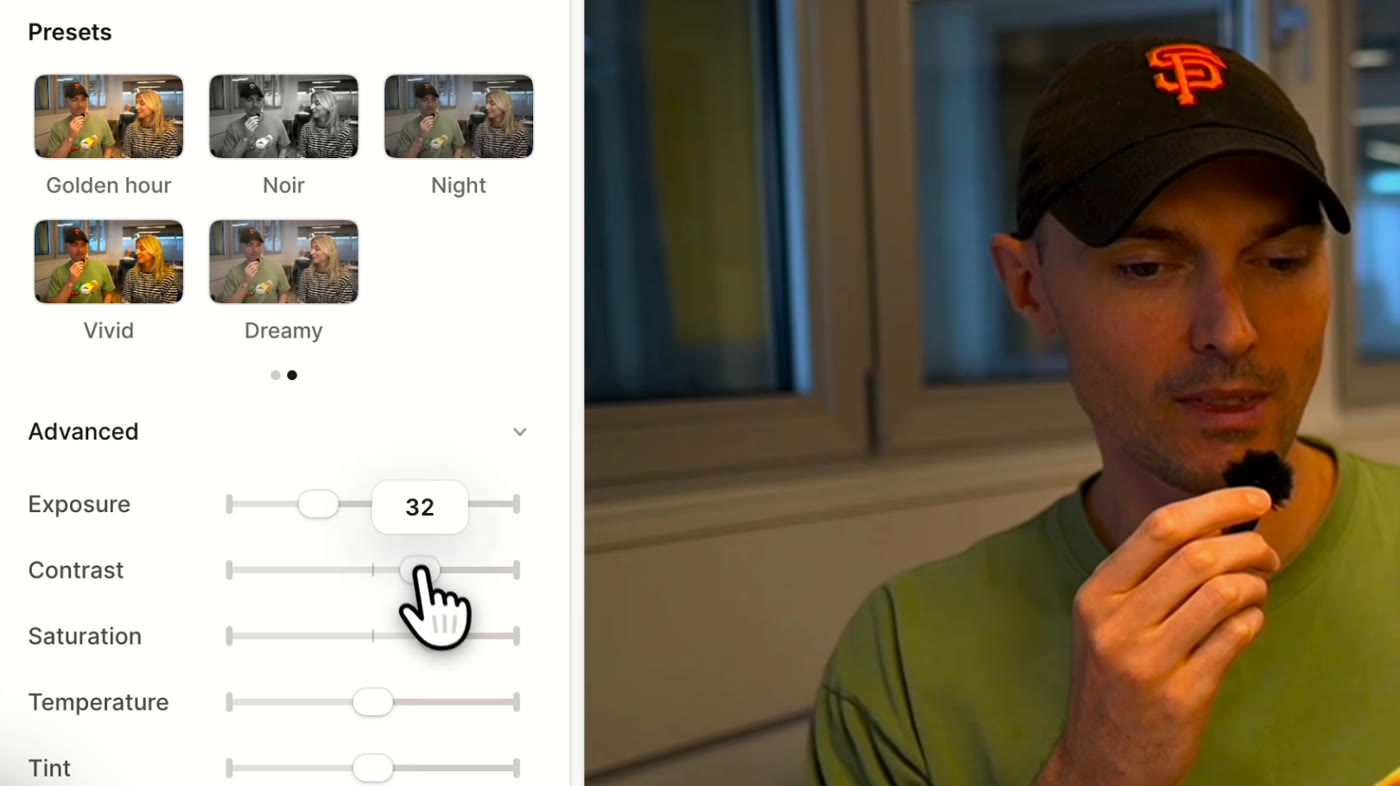
Open the video, press B, pick Camera under Filters, and click Customize. Under Advanced, fix the image:
- Exposure: most webcams underexpose faces under overhead lights. Raise it until the skin looks natural, not glowing.
- Temperature: move toward warm if you look blue or grey, toward cool if a desk lamp made you orange.
- Tint: fluorescent office lights often add a green cast. Nudge toward magenta to remove it.
- Contrast: raise it a little if the image looks flat.
If a preset is close, start from it. Warm already lifts temperature and exposure a little, which is most of what a typical webcam needs.
Option B: Add a look with a LUT
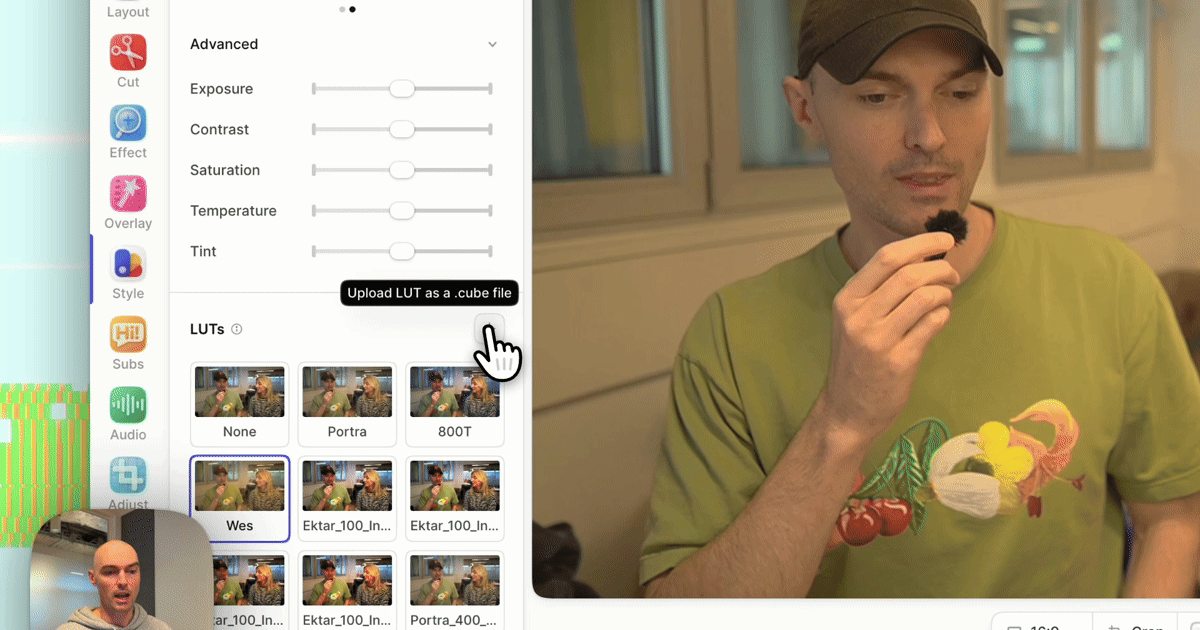
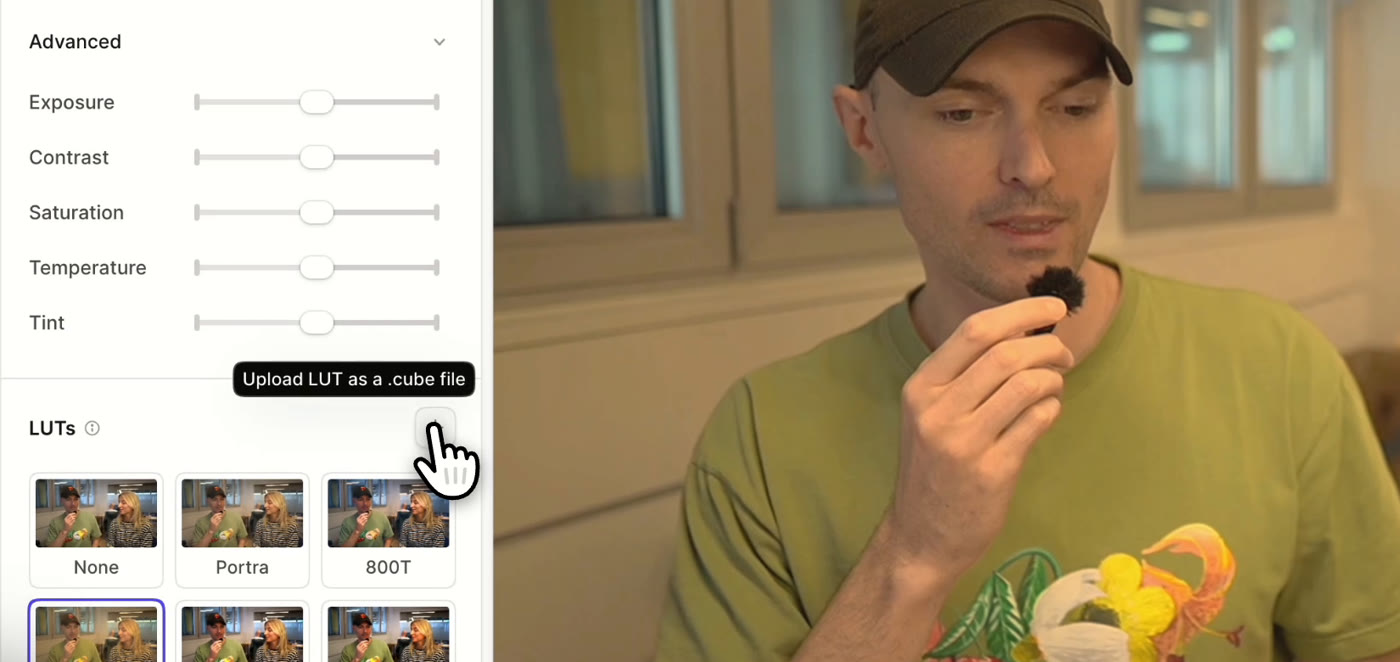
The LUTs section is below the sliders. Tella includes three film looks:
- Portra: warm, soft film stock. Flattering on most skin tones.
- 800T: tungsten night film, cooler with a cinematic feel.
- Wes: pastel, with the palette of a symmetrical-cinema still.
Or click Upload LUT as a .cube file to use your own. It's saved to your media library for the next video.
Turn the intensity down
LUTs are often built for log footage from cinema cameras. A webcam feed is already contrasty and saturated, so a LUT at full strength usually overdoes it: orange skin, crushed shadows. Drag LUT intensity down until the look reads as a grade rather than a filter. Around 40–60% suits most webcams.
Check every clip
The camera filter applies to every camera clip in the video by default. That's what you want if you recorded everything at one desk. If one clip was recorded somewhere else or at a different time of day, select it, check Apply to this clip, and correct it separately. Leave the box checked afterwards: unchecking it copies that clip's filter to every camera clip.
Leave the Screen tab at None, or give it Crisp if it looks flat next to the graded camera. Color filters for product demos covers why hue-shifting filters and product UI don't mix.
What can't color grading fix?
Grading can't fix bad lighting. Grading adjusts the colors you recorded. It can't add information:
- A dark image raised with Exposure gets noisy. Put a light in front of you, like a window or a lamp behind the monitor.
- Blown highlights, like a bright window behind you, stay white. Move or close the blind.
- Mixed lighting, like daylight on one side and a warm bulb on the other, gives one side of your face a different color, and no global slider fixes that. Turn one source off.
Fix the light, then grade. What equipment you need to be a YouTuber covers affordable lights.
When should you use Premiere or Resolve instead?
Use a timeline editor like Premiere Pro or DaVinci Resolve when you need:
- Secondary corrections: changing one color (a green wall) without touching skin.
- Scopes: waveform and vectorscope for broadcast delivery.
- Matching cameras: grading a cinema camera and a phone to match in a multicam edit.
For async demos, onboarding videos, and founder updates, those cost more time than they save.
Related reading
- How to apply a .cube LUT to a screen recording.
- Adjust your video's colors with filters: the help center reference.
- Record your screen and webcam at the same time.
Try Tella free for 7 days and grade your webcam without leaving the editor.